Tuesday 30 October 2012

Apple and Blueberry Pudding


I’m lucky enough to live just opposite from some of my best friends and we’ve created a tradition of taking turns to cook a roast dinner for everyone on Sundays. This week was our turn to do the pudding. This recipe originally uses blackberries but for some reason ASDA was completely sold out so we just swapped them. Serve this with some hot custard.
Ingredients
175g butter
300g plain flour
4 Bramley apples
300ml whipping cream
225g golden caster sugar
3 eggs
300g blueberries
Some lemon juice
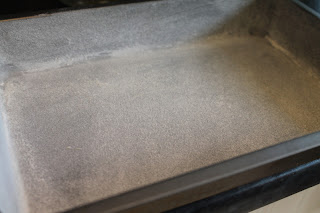
Preheat the oven to 200C. Grease a tray bake tin with butter and dust with some flour.

Peel the apples and slice them up. Set them aside in a bowl with some lemon juice to stop them from browning.
Add the cream and butter to a saucepan and bring them to the boil. Set it to one side.

In a large mixing bowl whisk the eggs and sugar together for about 3 minutes.

Whisk the creamy butter into the eggs.
Gently fold the flour in until everything is well combined.

Pour the batter into the tin.
Scatter the apples and blueberries over the batter and sprinkle with some more sugar.

 
Bake for 50 minutes-1 hour or until it is golden brown and shrinking away from the tin.
Leave it to cool in the tin, and then cut into squares.
Happy Sunday!


Sunday 28 October 2012

Dairy-free Gluten-free Blackcurrant Cake


A friend’s birthday was last week which meant that obviously we needed to make a cake. They’ve recently been potentially diagnosed with being lactose and wheat and gluten intolerant, so generally thought cake was not going to be an option. Not true! There are loads of ‘free-from’ recipes online and with most big supermarkets now having a free-from range of baking supplies there is no reason why allergy-friendly cakes cannot be baked.

This is a really easy all in one method, and I have reliable sources which say it tasted pretty good too. Also, yes I am a berk and didn’t figure out how much space I needed so the cake says ‘happy birth’.
Ingredients
300ml soya milk
1 ½ tablespoon lemon juice
150g dairy-free spread
225g caster sugar
3 large eggs, beaten
½ teaspoon vanilla extract
225g wheat and gluten free plain flour
1 teaspoon xantham gum (couldn’t find this though so just threw a few spoonfuls of corn flour in)
1 ½ teaspoon gluten free baking powder
½ teaspoon bicarbonate of soda
115g blackcurrant jam
For Icing
Lots of blackcurrant jam
A big blog of dairy-free spread
Lots of icing sugar
First of all, sorry for the total lack of photos but we didn’t have a lot of time to bake this, so I completely forgot. Preheat the oven to 180C.
In a large mixing bowl combine all the cake ingredients together with an electric whisk. We thought the batter looked a bit sloppy, but having never made a cake like this before I wasn’t really sure what the consistency should have been. I shoved a few extra spoonfuls of flour in any way until it thickened up a bit, and it didn’t seem to do anything drastically bad to the cake.
Divide into two sandwich tins and bake for 35-40 minutes until well risen and light brown. Cool on a wire rack.
Cream the spread into a bowl and sift a generous amount of icing sugar in. Spread half of this in between the two cakes with some blackcurrant jam. Spread the rest on the top. We then made a little more icing and mixed some of the jam in it to give it some colour, and piped some decoration.
This is a bit of a cheeky plug but I happen to be the Food Correspondent for my Uni’s newspaper The Galleon. If you fancy seeing other things I’m up to, especially as they tend to be more cooking recipes rather than baking ones, then check out http://www.galleonnews.com/features/food/

Monday 15 October 2012

Chocolate Penguin Cake


First of all, I hope everyone is just as excited as I am for the final of Great British Bake Off on Tuesday! I sort of want John to win, partly because he’s adorable but also because he’s ‘just a simple northern lad that dreams of being a pastry chef in Paris’ (N’awww).

I had what some people might find an odd request recently, which was could I possibly make a birthday cake for someone’s surprise party. Something that ideally would combine chocolate and penguins. You can see where this is going. So just to prove that I have been doing some baking recently, despite being a hideously busy 3rd year student, here’s how I made a chocolate penguin cake.
Ingredients
100g cocoa powder
12 tablespoons boiling water
6 large eggs
100ml milk
350g self-raising flour
2 teaspoons baking powder
200g butter, softened
550g caster sugar
For decoration
Around 200g butter
Somewhere near 2kg icing sugar
Black food colouring
Quite a lot of cocoa powder
Milk
Minstrels
Chocolate sprinkles
White royal icing
The first thing you should know when constructing a mahoosive cake like this is that it takes time. Because of this I baked all the cake layers the day before, and decorated the next morning, but it would be perfectly possible to do it all in one day if you didn’t have things like life getting in the way.
 I also made the royal icing decorations the day before, to give them the night to dry out a bit. To make them, roll out the royal icing quite thickly on a surface lightly sprinkled with icing sugar. Then, use a sharp knife to cut two round eyes, a round belly, a beak, two wings and two webbed feet. Leave them on a piece of baking parchment so that they don’t stick to anything. (Also if you have misplaced your rolling pin like me, an empty wine bottle works just the same…)
Preheat the oven to 180C. Prepare all your tins with baking parchment. I used two sandwich tins, another round slightly smaller tin, and a small bowl. Don’t be an idiot like me and not line the bowl with baking parchment…you will see why in a minute.

In a large mixing bowl combine the cocoa powder and boiling water until it forms a smooth, thick chocolate paste.


Add all the other cake ingredients to the bowl and use an electric whisk to combine well.

Divide the mixture between the tins, with around half of the batter being used for the two sandwich tins.
Bake in the oven for 25-30 minutes or until springy in the middle.
Leave them to cool on a wire rack.
You will see from these photos that my bowl cake went very wrong. Since the bowl bit was supposed to be the round head of the penguin this was a bit of a nuisance. Basically half the cake stayed in the bowl when I tried to get it out. This is either because I didn’t let it cool enough before taking it out, or as I stated before from not lining it with baking parchment. Luckily, icing covers a whole host of sins so in the end it didn’t really matter. The penguin just looks a bit…squat.
Once the cakes are completely cooled you can begin to decorate. It’s important to point out that this recipe will require a bucket load of icing. I made two monstrous bowls of the stuff in the end.
In a large bowl, cream a huge knob of butter.

Sift in 3-6 big spoons of cocoa powder, depending on taste.

Sift in loads of icing sugar, alternating with small spoons of milk.
Add in some black food colouring, until the icing becomes a grey, brown colour (Think furry baby penguin here).
To assemble, first have your base ready.
Place one of the sandwich cakes on the bottom, with a few blobs of icing to make it stick to the base.
Thickly spread some butter icing on top, and place the other sandwich cake on top.
Repeat this, placing the smaller sandwich cake as the 3rd layer.
Finally ice this cake, and add the bowl cake as the head.
Now completely cover the cake in icing. (At this point I needed to make more)
Once the penguin is entirely covered, and you’re happy that there are no gaps it’s time to add the royal icing decorations. Start with the round belly bit. Blob a bit of icing all over it, like glue, and slap it onto the middle of the penguin. Press it down firmly for a good 30 seconds until it feels adhered.
Repeat this with the wings, feet, beak and eyes. Glue a minstrel into the middle of each eye with a bit of icing. To give the penguin a more ‘furry’ look, spike the icing all over the top of its head and cover with chocolate sprinkles. Do this around the belly and also the wings to give them some definition. Finally, prop something up against the beak whilst it’s drying because it’s quite heavy and you don’t want it to fall off.

After all that you should have a penguin cake! And not, as my delightful Pompey taxi driver called it, an owl that looks like it’s going for a shit…


Tuesday 2 October 2012

Lemon Drizzle Traybake


This is one of my favourite recipes so I have no idea why I haven’t blogged it yet?! I love it because it’s because it’s so easy to make and tastes completely scrumptious. I made it for my book club which turned into pub club since no one actually had time to read the book…I don’t know what the etiquette is on randomly eating cake in the middle of a pub but I think since we all bought drinks they didn’t seem to mind.

You might also notice that I have shiny, posh pictures again. I couldn’t hack it with my semi-dead digital anymore so I used the money my granddad gave me for my 21st to buy a DSLR. Since it was my wonderful grandma who helped to teach me how to bake, I feel that she would have approved of me buying a camera simply to take pictures of cake.
Ingredients
8oz soft butter
8oz caster sugar
10oz self-raising flour
2tsp baking powder
4 eggs
4 tbsp milk
Zest of 2 lemons
For topping
6oz granulated sugar
Juice of 2 lemons
Preheat the oven to 160C. Line a rectangular baking tray with baking parchment.

Mix all the ingredients except for the lemon zest in a large mixing bowl.

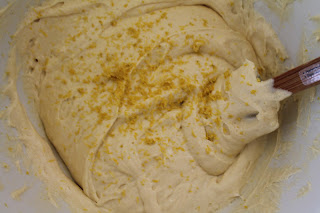
Finely grate the zest and fold it into the batter.

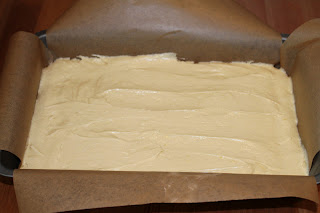
Pour the mixture into the tin, making sure you push the batter into the corners and smooth the surface. Bake for 35-40 minutes until golden brown and springy to the touch.

Leave to cool for a few minutes, then place the cake on top of a wire rack over some baking parchment.
Using a cocktail stick carefully prick the cake all over. Mix the sugar and lemon juice together then spoon evenly all over the cake. Leave it to cool then cut into squares.


Here’s a cheeky snap of my new camera because I laaaaave it.