Sunday 26 February 2012

Malibu and Coconut Cake Pops

I’ve wanted to try cake pops for ages so I thought as I have loads of work to do, I’ll make cake pops this weekend instead! (Denial tastes best in the form of baked goods) I did them over two days but you could easily do it all in one.

 Before you start you need some specific cake pop paraphernalia: cake pop sticks! I got mine at a shop called Fondantly Yours down Elm Grove in Portsmouth but I’m sure you can order them online if you can’t find them anywhere. Also most recipes I’ve read suggest you need a polystyrene block to hold the pops but I couldn’t find polystyrene ANYWHERE!

Instead I bought some plastic trays for growing seedlings from wilkos (98p for 3) which have the perfect sized holes for the cake pops to sit in. Now they’re not the prettiest thing to display the pops in but as long as they taste nice I don’t really give a monkeys!

Don’t be put off by the long daunting list of things you need; they were far easier to make than I thought they would be.

What you need

Cake pop sticks

Seedling tray (or polystyrene if you can find it)

Large cake tin (any shape)

Baking parchment

Lots of bowls

And spoons

A mug

A saucepan


Ingredients

Cake

3 eggs

200g self-raising flour

200g of caster sugar

200g of butter

1 tsp of baking powder

3 cap-fulls of Malibu

Icing

A couple knobs of butter

Lots of Icing Sugar

3-6 cap-fulls of Malibu

A few splashes of milk

2 handfuls of desiccated coconut

Coating

Big bar of cooking chocolate

Lots of desiccated coconut

The first step is to bake the simple cake. Put all the ingredients into a bowl and mix well.


Bake in a preheated oven of Gas Mark 4/ 180c for 25-30 mins or until brown and springy to the touch. Set the cake to one side and leave to cool. When the cake is completely cooled crumble it into a bowl. Seriously wait until it’s cooled properly because if it’s still warm the cake will crumble to dust! As a tip don’t bake the cake when you’re disgustingly hungover and drop it on the floor because this will happen…


Although if you’re going to drop a cake on the floor it might as well be in a recipe where you have to crumble it up anyway!


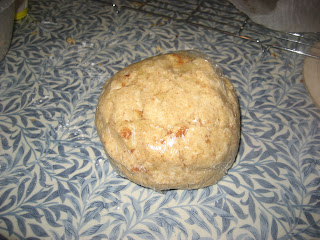
Now cream the butter and sift in the icing sugar in a separate bowl. Mix in as much Malibu as you like, it’s all down to taste. I originally made one bowl of icing but had to make a second because it wasn’t enough so all in all I used 6 cap-fulls of Malibu for the icing. Add it to the cake crumble one spoonful at a time and mix well. When you can get the mixture into a ball wrap it in clingfilm and chill in the fridge. I left it overnight (only because I was going out) but if you wanted to do everything in one day chill for about 3 hours.


The next step when the mixture is chilled is to roll it into lots of small balls onto some baking parchment. Mine were spectacularly ununiformed in shape but I kind of like them that way. Then pop them back into the fridge for 30 mins- an hour.

For the final step don’t make the same mistake as me and buy special expensive chocolate coating. You will burn it in the microwave and then be forced to run to Tescos fifteen minutes before closing, which is a treat let me tell you. Instead, melt the chocolate in a bowl on top of a saucepan of simmering water. Be patient with it and melt slowly on a low heat. When the chocolate’s completely melted pour it into a mug which is easier to dip the pops in than a bowl.
Good chocolate versus ruined/burnt batch!
Take the cake balls out of the fridge. Dip the end of a stick into some melted chocolate then insert it about halfway into a ball. Repeat this for all sticks and balls. It was only as I got to this stage that I realised that I had only 20 sticks and around 30 balls. As an obvious tip consider this before you start everything and buy the right amount of sticks!


With all the sticks inserted into the balls dip them into the mug of melted chocolate until coated, then over a plate sprinkle on some desiccated coconut. Place them into the seedling tray to dry. Now eat with a large cup of tea!


Tuesday 14 February 2012

Red Velvet Valentine's Day Cupcakes

My mother has always insisted that a man’s stomach is the way to his heart so what better way than CAKE! In the future when I have lots of time and money (haha) I really want to try this Hidden Heart Cake because it looks amazing, but for now I’ll stick with some Red Velvet Cupcakes.

I’ve read all sorts of recipes for these including buttermilk, beetroot and other things but I’ve kept mine as simple as possible so that anyone can do them! The scales we’ve got at our kitchen are annoying inaccurate so I tend to weigh the eggs and then measure equal flour, butter and sugar. As long as you keep everything in proportion it tends to work out so if you want a bigger batch just adjust the mixture.

Preheat the oven to gas mark 4/180⁰C.
2 Eggs
Unsalted Butter (I use Stork)
Caster Sugar
Self-Raising Flour
1 Teaspoon of Baking Powder
2 Tablespoons of Cocoa Powder
A splash of milk
Red Food dye (as much as you want)

(You’ll notice that my measurements are not very specific. That’s simply because that’s the way I bake, a splash here, a dollop there. Baking is all about trial and error so the more you do it the more you’ll recognise if the consistency and taste of the mixture is right or not!)

First cream the butter and sugar together. Then add the eggs, beating them in as you go. Sift the flour, baking powder and cocoa powder and mix all ingredients together. Add a splash of milk and red food dye in drops, mixing as you go to gauge colour. Bake in the oven for 15-20 minutes turning the tray around at after at least 12 minutes so that they bake evenly but don’t sink.


When they’re done cool them on a wire rack and get making the butter icing.


Unsalted Butter
Cream Cheese
Icing Sugar

Don’t ask me how much I used of each because I don’t think I have EVER measured anything when making icing. I spooned equal dollops of butter and cream cheese (a large wooden spoonful of each) into a bowl and creamed together. Then I sifted in icing sugar until it felt stiff enough to hold its shape but not so stiff that it wouldn’t pipe properly. If the mixture becomes too stiff just splash a very small amount of milk in.

Then I got to use my absolute favourite piece of baking kit. It’s a Lakeland silicone piping set my mum got me for Christmas and it is literally the best thing ever. Once you get over the fact that it looks like a giant condom it’s really easy to use and washes up in a nanosecond.


I then piped a swirl on each cupcake (I apologise that some look a bit suspect but I was running out of icing). Now, if I wanted the cakes to look sophisticated I would leave them like that but do I ‘eck ever want my cakes to look posh. So on went the edible glitter. LOOOVE the edible glitter. Then using writing icing I iced badly drawn hearts on them all, since it is Valentine’s Day after all.


I then had a cup of tea and ate one. What else would I do?


P.S. My mum sent me this picture of the cake she made for my dad this morning. That isn’t one small cupcake of many. It is one GIANT cupcake. As in the plate it’s on is the size of a dinner plate. I started to feel a bit inferior about my poxy cupcakes after this but my mum has had thirty odd extra years at this game so I’ll get over it.


Monday 13 February 2012

Whoopie Pies


Last year I did a unit about Magazine Writing where I was able to write a baking article a.k.a. easiest piece of coursework everrrr. At the time whoopie pies were a big baking trend so I gave it a go. They’re really tasty and make impressive little tea-time treats.

Here is a basic whoopie recipe but there are endless variations. Depending on what you like, once you’ve mastered the basics you can make pretty much any flavour of whoopie you wish.

The basic whoopie recipe:
Makes around 24 whoopie pies

Prep time: 20 mins + 30 mins chilling time

Cooking time: between 8-10 mins at 180°C/ gas 4

280g plain flour
¼ tsp baking powder
¼ tsp bicarbonate of soda
A pinch of salt
150g unsalted butter, softened
125g sugar
1 large egg
1 large egg yolk
100ml whole milk
1 tsp pure vanilla extract

In a bowl sift together the flour, baking powder and bicarbonate of soda. Stir in salt and leave to one side.


In a separate bowl cream the softened butter
and sugar together until light and fluffy using
an electric hand whisk. Add the egg and egg yolk
and mix well. Add the milk and vanilla to the
butter mixture. Slowly add the dry ingredients,
mixing until just incorporated.
Chill in the fridge for 30 minutes.


This gives you time to complete the most enjoyable aspect of baking: the washing up!


Meanwhile preheat the oven and line 3 trays with baking parchment. Depending on oven size it may take several batches to bake the whole mixture. Other recipes I’ve seen state that you drop small scoops of batter 5cm apart but on my first attempt at making whoopies I was rewarded with one big whoopie. It still tasted very nice but be warned, the mixture spreads in the oven. On my second attempt I put around 9 balls on each tray with plenty of room to grow which worked perfectly. I used two small tea spoons to make little balls of mixture; don’t be tempted to flatten the top as you might with a cookie because the whoopie should be slightly round in shape.


Bake the whoopies until they are left with a slight impression when touched with a finger (Don’t be put off by this if you are used to baking cakes which should spring back when cooked). Remove from the oven and cool on a wire rack.


To assemble the whoopies into whoopie pies you need to make some filling. The traditional American recipes like to use a fluffy marshmallow cream. For this you need:

3 egg whites
150g caster sugar
2 tbsp golden syrup
Pinch of salt
1tsp pure vanilla extract

Weigh all ingredients into a heatproof bowl and place over a saucepan of boiling water. Whisk continuously by hand until the sugar has dissolved and the mixture looks frothy and slightly opaque (takes around 10 mins).

Remove from the heat and whip the mixture on a very high speed using an electric whisker until it is white and thick and holds its shape. Use straight away. You can mix in some colouring or replace the vanilla with an essence such as lemon to decorate them how you like.


If you are making the whoopies for an occasion make them several hours before to give the filling the time to set. I believe the whoopie pies will keep well for at least three days but mine have never been around long enough to test this theory since they always get eaten as quickly as humanly possible.  

Other flavours I’ve tried can transform the whoopie into something quite special. I’ve tried a chocolate chip whoopie where you replace the milk with buttermilk and dark chocolate chips put together with a chocolate butter cream. The coconut whoopie uses coconut milk, rum and desiccated coconut and is surprisingly light and has a softer texture than the basic whoopie.


For more recipes simply type ‘whoopie pie’ into Amazon and you get a whole range of books including ‘Whoopie Pies Go British’ for an English take and a lovely book ‘The whoopie pie book’ with tons of ideas by Claire Ptak who owns Violet, a London baking company.

Hello :)

Hello chums…this is my first step into the foray of Baking Blogging. I don’t have fancy equipment/ingredients/recipes being a student, but I’m among the huge group of amateur bakers out there in the world where happiness is found at the end of a wooden spoon! Posts may be sporadic/boring/generally unhelpful but bare with me and most importantly: Happy Baking!

To start here are a few links to my other blog (where I mainly complain about being poor, I wouldn’t bother reading it) where I’ve detailed some of my baking exploits!


Here are a few random photos of things I’ve baked and uploaded to Twitter!
Mocha Cupcake
Lady Grey Cupcakes
Chocolate éclairs
Lemon Drizzle Halloween Cupcakes