Tuesday, 19 February 2013

Honey and Lemon Cupcakes


It’s sunny in Portsmouth which makes me a very happy bunny. I have decided to stay positive and believe that spring is just around the corner, despite this weekend’s weather forecast. So with it being almost spring and all, everyone needs some delicious treats to have with a cup of tea and a friend in the sunshine. These cakes are soft and moist, and not too heavy.

I kind of randomly amalgamated recipes for this one, mostly because honey and lemon is a ridiculously good combination. You will see that this recipe only makes 6 cupcakes, and that is because all of my silly friends are on diets and will shout at me if I make any more- but feel free to increase the amounts if you want more cupcakes, or if you’d rather bake one big cake.


Ingredients

70g butter

80g honey plus extra

30g dark muscovado or soft brown sugar

1 egg

100g plain flour

1tsp baking powder

Zest and juice of 1 lemon

Preheat the oven to 160⁰C. Line a cupcake tray with six cake cases.

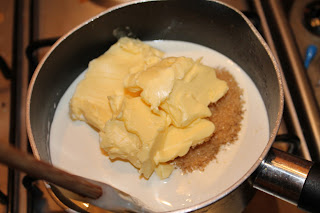
In a small pan gently melt the butter, sugar and honey. When it’s all liquid, bring it to the boil and then leave to cool on the side.


Sift the flour and baking powder into a large mixing bowl. Grate the zest of the lemon into it.


When the honey mixture is cooled, beat the egg into it.


Pour the liquid into the flour and beat until it forms a smooth batter.


Spoon the batter evenly between the six cases. Bake for 15 minutes or until golden brown and springy to the touch.


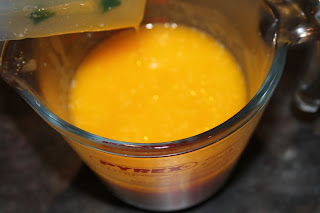
While the cakes are baking, gently heat a couple spoonfuls of honey with the juice of the lemon. When the cakes are done, transfer them to a wire rack and pour the lemony honey over them while they are still warm. Leave them to cool.


As the plate indicates- consume with a cup of tea.


Saturday, 9 February 2013

Blush Orange Swiss Roll


I’m home for Chinese New Year, and I wasn’t planning on baking anything but then I saw this bad boy.


My mum has gone and bought a KitchenAid. I am sooo jealous but at the same time even more determined to save up the money to buy my own. Especially after using it, my god, it whisked like a dream. I wanted to bake something that involved whisking to see if using a really expensive piece of equipment really makes that much of a difference to the amount of air you can fold into a fatless sponge. Well do you know what, it bloody well does. Not to say that you can’t make Swiss Rolls without a KitchenAid- but they are lovely and light if you do.

Also thought I’d make a little twist on a normal lemon or strawberry Swiss Roll by taking advantage of the Blush Oranges in season right now. They’re bright red inside which makes me happy because as you know I’m a bit of a magpie.


Ingredients

3 eggs

4oz caster sugar

4oz plain flour

Zest of blush orange

For Icing

7oz icing sugar

4oz butter

4oz orange curd

2tsp blush orange juice

Preheat the oven to 200⁰C. Line a Swiss Roll tin with baking parchment.


Add the eggs, sugar and zest to a heat-proof bowl and place over a gently simmering pan of water.


Whisk using a hand-held whisk until the mixture becomes pale and frothy.


Remove the bowl from the heat and whisk for a further 5 minutes. This is where my mum’s beautiful new KitchenAid came into play! I poured the lightly whisked egg mixture into the machine and popped it onto speed ‘8’ and let it do its magic for 5 minutes. I was so impressed by how much they fluffed up; I’ve definitely never been able to do that with a hand-held before.


After this sift in about half of the flour and very gently fold into the egg mixture using a large, metal spoon.


Fold in the rest of the flour, trying not to beat out too much of the air.

Pour into the tin and gently even up with a spatula.


Bake for 10-12 minutes or until golden brown and firm to the touch.


While it’s in the oven, get a tea towel and place a large piece of baking parchment on top of it. Dust this liberally with more caster sugar.


When the roll is baked, quickly turn it out onto the sugared paper and peel off the bottom layer of parchment.


Trim the crusty edges along the two longer sides, and make an indentation about an inch in from one of the shorter edges.


Quickly, while it’s still warm, roll it tightly from the scored edge, wrapping the sugared paper and tea towel inside. Place on a wire rack and leave to completely cool like this.


When the roll is ready, make the icing by creaming the butter and icing sugar together. Add the blood orange juice and beat it in completely. Have a taste and if you want it to be more orangey, add some more juice, a little at a time, followed by a spoonful of icing sugar to balance.


Carefully unfurl the roll. Recipes I read said to spread the icing and then the curd on top. I did this and to be honest it didn’t make much sense so I’d suggest doing it the other way around. Either way spread the icing and curd evenly all over the roll.


Starting from the scored edge, tightly roll the sponge up, peeling off the sugared paper as you go. Place onto a pretty plate and then go nuts! Fatless sponges like these tend to be best on the day you make them. And obviously taste best with a cup of tea.


Tuesday, 5 February 2013

Sticky Toffee Pudding


First of all this is a date-free recipe because although I do enjoy a juicy date (hah), who in their right mind would put them in a PUDDING? Also I baked this in a tray bake which was clearly a bit silly because it was really thin and long instead of fat and short. It would be much better in a square tin. It all tastes the same in the end though so who cares? Also Soz was a bit too busy eating it to take many photos.

I apologise for the general lack of recipes at the moment, but I have something silly like ten weeks to write another 20,000 words, so excuse me because while I am obviously weeping into cake, I really can’t be arsed to blog about it. (Watch this space come May time when I will have finished my degree, and will quite likely be an unemployed graduate, baking to pretend like I have a life post-uni.)

Ingredients

190g plain flour

120g light muscovado sugar

1 ½ tsp baking powder

Pinch salt

120ml milk

2 eggs

6tbsps melted butter

2tsps vanilla extract

For sauce:

120g butter

200g soft brown sugar (or whatever you have really)

250ml double cream

Preheat the oven to 170⁰C. Lightly grease a square tin.

Sift the flour, baking powder and salt into a large mixing bowl.


Stir in the sugar.


Melt the butter on a low heat.


In a jug mix the milk, lightly beaten eggs, vanilla extract and melted butter.


Add to the flour mixture and fold until smooth.


Pour into the tin and bake for 20-30 minutes or until the cake is firm on top. And yes I do mean firm, you’ll know what I mean when you give it a poke.


For the sauce melt all the ingredients over a gentle heat, stirring frequently until the sugar has completely dissolved.


Serve up the pudding with the sauce, and some hot custard if you’re fatties like us.


My first ever baking blog post was on Valentine’s Day last year. If you’re interested you can see my recipe for Red Velvet Cupcakes here.  Don’t expect a recipe this year though, I’ve fully planned in advance to be hungover and miserable next Thursday, ‘cos that’s how we do.