Before you start you need some specific cake pop paraphernalia: cake pop sticks! I got mine at a shop called Fondantly Yours down Elm Grove in Portsmouth but I’m sure you can order them online if you can’t find them anywhere. Also most recipes I’ve read suggest you need a polystyrene block to hold the pops but I couldn’t find polystyrene ANYWHERE!
Instead I bought some plastic trays for growing seedlings from wilkos (98p for 3) which have the perfect sized holes for the cake pops to sit in. Now they’re not the prettiest thing to display the pops in but as long as they taste nice I don’t really give a monkeys!
Don’t be put off by the long daunting list of things you need; they were far easier to make than I thought they would be.
What you need
Cake pop sticks
Seedling tray (or polystyrene if you can find it)
Large cake tin (any shape)
Baking parchment
Lots of bowls
And spoons
A mug
A saucepan
Ingredients
Cake
3 eggs
200g self-raising flour
200g of caster sugar
200g of butter
1 tsp of baking powder
3 cap-fulls of Malibu
Icing
A couple knobs of butter
Lots of Icing Sugar
3-6 cap-fulls of Malibu
A few splashes of milk
2 handfuls of desiccated coconut
Coating
Big bar of cooking chocolate
Lots of desiccated coconut
The first step is to bake the simple cake. Put all the ingredients into a bowl and mix well.
Bake in a preheated oven of Gas Mark 4/ 180⁰c for 25-30 mins or until brown and springy to the touch. Set the cake to one side and leave to cool. When the cake is completely cooled crumble it into a bowl. Seriously wait until it’s cooled properly because if it’s still warm the cake will crumble to dust! As a tip don’t bake the cake when you’re disgustingly hungover and drop it on the floor because this will happen…
Although if you’re going to drop a cake on the floor it might as well be in a recipe where you have to crumble it up anyway!
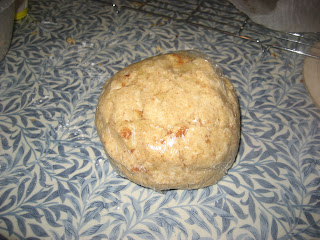
Now cream the butter and sift in the icing sugar in a separate bowl. Mix in as much Malibu as you like, it’s all down to taste. I originally made one bowl of icing but had to make a second because it wasn’t enough so all in all I used 6 cap-fulls of Malibu for the icing. Add it to the cake crumble one spoonful at a time and mix well. When you can get the mixture into a ball wrap it in clingfilm and chill in the fridge. I left it overnight (only because I was going out) but if you wanted to do everything in one day chill for about 3 hours.
The next step when the mixture is chilled is to roll it into lots of small balls onto some baking parchment. Mine were spectacularly ununiformed in shape but I kind of like them that way. Then pop them back into the fridge for 30 mins- an hour.
For the final step don’t make the same mistake as me and buy special expensive chocolate coating. You will burn it in the microwave and then be forced to run to Tescos fifteen minutes before closing, which is a treat let me tell you. Instead, melt the chocolate in a bowl on top of a saucepan of simmering water. Be patient with it and melt slowly on a low heat. When the chocolate’s completely melted pour it into a mug which is easier to dip the pops in than a bowl.
Good chocolate versus ruined/burnt batch!
Take the cake balls out of the fridge. Dip the end of a stick into some melted chocolate then insert it about halfway into a ball. Repeat this for all sticks and balls. It was only as I got to this stage that I realised that I had only 20 sticks and around 30 balls. As an obvious tip consider this before you start everything and buy the right amount of sticks!
With all the sticks inserted into the balls dip them into the mug of melted chocolate until coated, then over a plate sprinkle on some desiccated coconut. Place them into the seedling tray to dry. Now eat with a large cup of tea!


No comments:
Post a Comment